By Chris Scott Barr
If you’re an artist that enjoys working on the digital side of things, there’s a good chance that you’ve encountered a Wacom tablet of some sort. Since most of my work is done with a pencil or pen anyway, transitioning to a tablet was a natural step. I’ve been using them off and on for the last 6 years or so. The most difficult barrier to get over is always the disconnect one feels when drawing on one surface, while seeing their work on another. Of course, that’s what the Cintiq line is for.
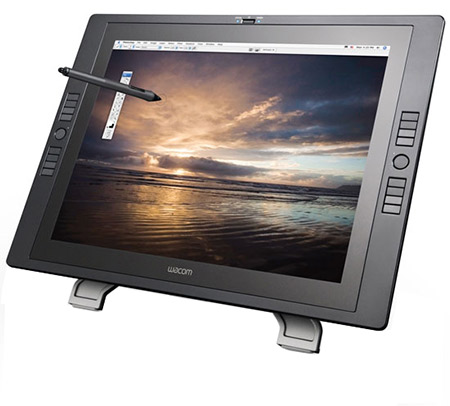
The Cintiq line is Wacom’s own brand of LCD monitor, which also happens to be a fully-functional drawing tablet. Since it’s introduction years ago, digital artists everywhere (myself included) have drooled over the idea of using one. Recently I was able to spend a few weeks with the latest Wacom Cintiq 21UX.
Overview
The Cintiq 21UX features a 21.3-inch LCD screen that displays at a maximum resolution of 1600×1200 (4:3 aspect ratio). Other notable features about the screen itself are the 200cd/m2 brightness, 550:1 contrast ratio and 0.27 mm dot pitch. Off the bat, you’ll probably not that as far as monitors go, this one is far from being spectacular. This much is true, and you probably won’t want to use this as your primary screen. Of course, that’s acceptable because that’s not what this device was designed for.
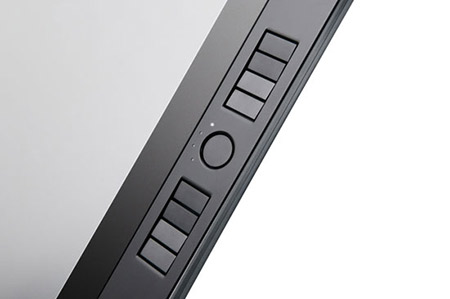
On to the tablet features, you’ll find 2048 levels of pressure sensitivity, which is standard on Wacom’s higher-end products. On either side of the screen you’ll see a set of eight programmable ExpressKeys (for a total of 16). These are great for setting up shortcuts to different tools, actions and even macros. You’ll also find a toggle button on each side. These actually control what the two rear-mounted Touch Strips do. The strips can be set to cycle through layers, zoom, cycle layers or rotate your canvas.
Setup
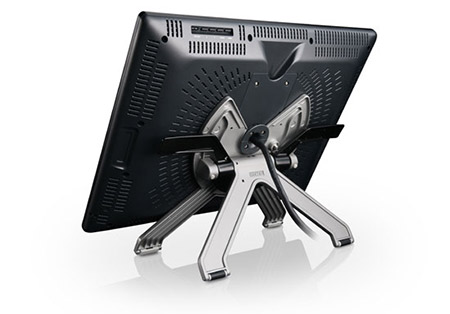
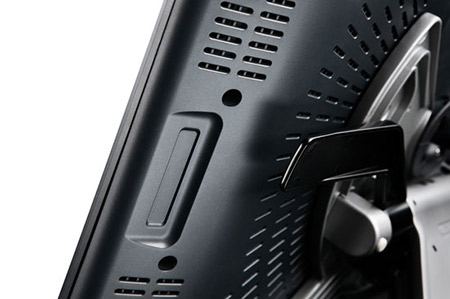
Setting up the Cintiq is not quite so simple as an Intuos or Bamboo. The product consists of two main pieces: the monitor and the stand. You’ll need to get your stand setup on your desk, then slide the monitor into place (which can take a couple of tries to get right). Once that’s taken care of, you can opt to install a set of screws to lock the orientation of the screen. If you don’t plan on rotating it while you’re working, then you’ll probably want to go ahead and do this.
Next you’ll need to put the three cords in their proper place. These are a DVI cable (there is also aVGA adapter included if you need it), USB cable, and power cord. Unfortunately you will have to deal with an external power brick, which is only a slight annoyance. After you’ve taken care of that, you can install the included software and go about your business of creating art.
It should be noted that this device is very heavy, and will take up a good portion of space. When I say heavy, we’re talking just over 22lbs for the monitor and stand combined. This isn’t the kind of tablet that you’ll want to take with you when you’re on the road. The Cintiq also sits at an angle at all times, so it takes up more of your available desk space than a regular monitor. The stand can be adjusted to sit at an angle of anywhere between 10° to 65°. So definitely bear that in mind when deciding where you want to set it.
Functionality
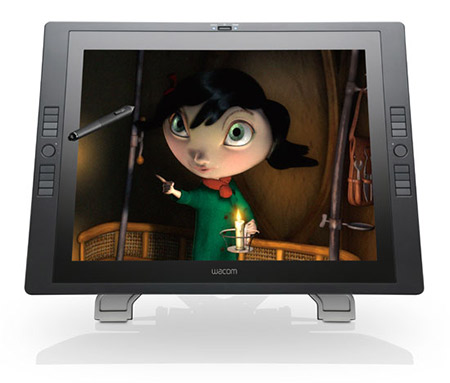
Using the Cintiq is an experience vastly different from any of the other tablets that I’ve worked with in the past. The glass has a different texture to it than the others, so this created a unique drawing experience. Of course, the main difference is that I could actually see what was happening beneath the tip of my pen. Despite years of getting used to the idea of drawing on a tablet while staring at a separate monitor, it made a huge difference in my drawing experience.
There is an initial “getting used to it” phase that you’ll go through. This is mostly due to the fact that the glass covering the screen is slightly raised from the actual display. It is very minor, but noticeable. Once you spend a little while adjusting to it, you won’t even notice it anymore. You can also adjust for this by using the manual calibration tool.
One great thing about the 21UX is the ability to adjust the angle at which the display sits. I’m the kind of artist that likes to adjust my drawing pad at different times while I work. Sometimes I like it to sit more vertical, other times I want it lying down a bit. The stand has a pair of levers that you pull, and then gently lift or set back the screen to your liking. It ranges from 10° to 65°, which does mean that you’re never going to have it perfectly standing up or lying down. While this would be annoying for your average monitor, it makes sense as a drawing surface.
The ExpressKeys and Touch Strips are great tools that add to the flow of your creative process. Being able to quickly tap a key or slide your finger to switch tools or zoom can really speed things up. I do lament the fact that the ExpressKeys don’t have their own individual LCD screens like on the Intuos4. I’m quite forgetful, so I often find myself hitting the wrong one until I finally get used to it. Of course had they added this feature, it would have only added to the overall bulk of the device.
Conclusion
If you do any amount of digital artwork, you will absolutely love working with the Wacom Cintiq 21UX. It’s the closest thing to sitting down with a pad of paper and a pencil that you’re going to find. I found myself enjoying the overall experience of drawing digitally more than I have since I got my first Graphire years ago. The $1999 price tag is what is going to keep most users from purchasing this product. I will say, however, if it is within your budget, you won’t regret making this purchase.
[ Wacom ]



Thanks for the review. I've been trying to justify purchasing one of these since Wacom first came out with them years ago. After checking out this one, I think it's finally time to take the leap!