By Andrew Liszewski
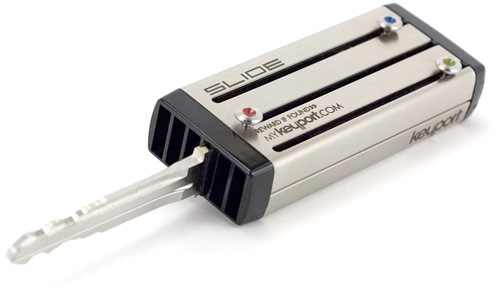
In my 5 or 6 years of blogging about gadgets and gizmos, the Keyport Slide stands out as one product that had a bit of a rough time making its way to the marketplace. We first wrote about the Keyport back in 2007 which we thought was a great concept, with not so great pricing and execution. $300 for a fancy key holder was expensive, no doubt about that, and users were asked to physically mail in the keys they wanted converted, which a lot of people thought was a little sketchy.
In 2009 when customers who had originally ordered the Slide still hadn’t received their product, we were pretty sure the product was DOA. But it turns out that wasn’t the end of the saga. By 2010 the company behind the Keyport had not only sorted out and vastly improved the logistics of the ordering process, but the price had been slashed to $79.99. And customers (finally!) started receiving their orders, which turned out to work just as promised. So when we were offered the chance to try out the latest version of the Keyport Slide we jumped at the opportunity. Both because we still think it’s a great idea and product, and also for some much needed closure. Check out our full review after the jump.
Truth be told, while the $295 price tag of the original Keyport probably deterred a lot of interested buyers, I think it was the ordering process which was the most worrisome. At least it caused me to raise an eyebrow. Since the Keyport used specially cut blanks the company actually required their customers to send in a copy of all 6 keys they wanted converted. Like physically throw them in an envelope and snail mail them in. So a lot of potential customers, myself included, scoffed at that idea.
But the ordering process the company now uses is far more streamlined. It does still require a bit of work on the part of the customer when placing an order, but it feels far more secure than having to mail them a set of your keys.
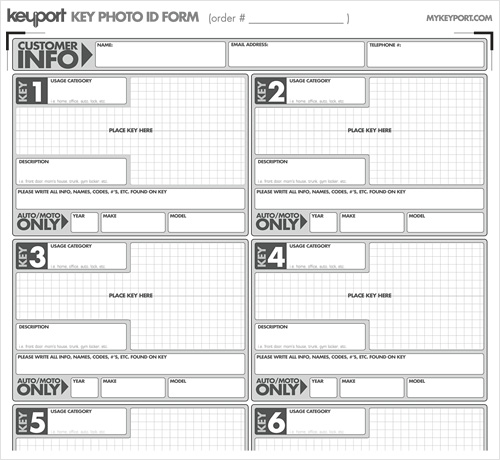
On the Keyport website there’s a downloadable PDF order form which includes 6 spots, one for every key you’d like to potentially use with the Slide. Instead of having you mail in your keys, the company now sends you blank blades you get cut yourself. But in order to figure out which blanks you’ll actually need, you need to properly fill out this form. This includes listing what the key is used for, as well as any markings or lettering appearing on it.
They also request that you lay out all 6 of your regular keys in the spaces provided and take a digital photo of both the front and back of all of them. This provides an extra clue for the company’s locksmiths to determine just what blanks you’re going to need. And if you’re worried about someone using these photos to make copies of your keys, you’re encouraged to cover the teeth with tape before taking the photos, or do what I did and just censor them out in Photoshop before sending them in via the secure uploader on the Keyport website.
The process is relatively easy, and ensuring you’ve sent along the right info will ensure you end up getting the right blanks when your Keyport Slide finally arrives.
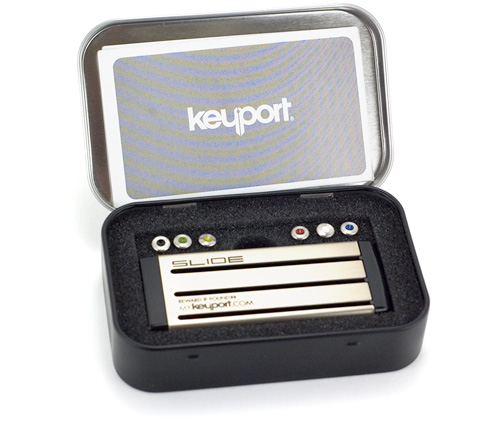
After you’ve completed the ordering process you’ll get your Keyport Slide in about a week (2 weeks worst case scenario) which comes in a small Altoids-esque foam-padded metal tin.
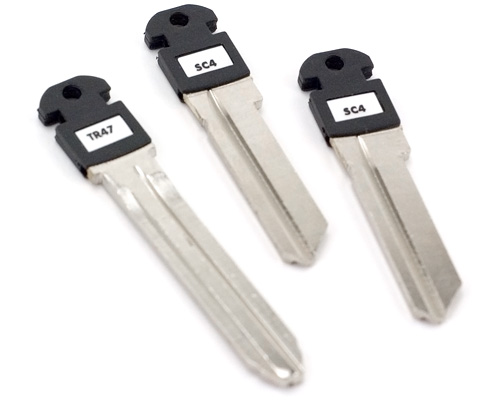
You’ll also receive a small black plastic bag with the blank blades that correlate to the 6 keys you specified on the order form. So of course the next step is to get the blanks cut to match your original keys, and unfortunately this is where you’ll want to be very careful. As you can see the Keyport blades are not exactly the same shape as a standard blank key, since they each feature a plastic nub on the end. And I found that some locksmiths were kind of apprehensive about cutting them. So if there’s any kind of trepidation, I highly recommend moving on to someone else.
My first attempt to get the blanks cut was not exactly what I’d call successful, so I had to re-order a few of them to try again. Thankfully the second time around things worked out, but you’ll also want to keep in mind that most places are going to charge you for the labor and probably even a blank key, even though you don’t need one. So that also has to be factored into the overall price of the Keyport. And from my personal experience I highly recommend getting the blanks cut at someplace like a big hardware store. They usually employ an automated machine for cutting keys that minimizes user error, but mistakes could still happen.
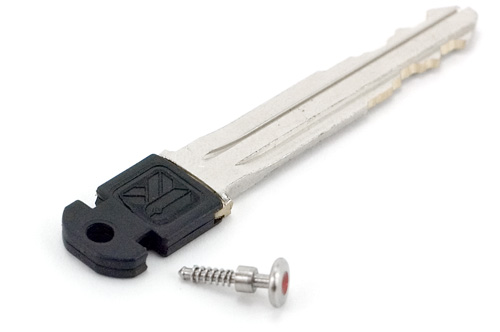
Once you’ve got your keys successfully cut AND you’ve tested them to make sure they all work, you can start assembling the Keyport. The first step is to install the included spring pins onto each key. It’s quite literally as easy as just sticking the pin into a hole on either side of the key, depending on how you want the teeth to be oriented when it slides out. In fact the most difficult part of this process is deciding which color pin to use since all 6 of them are different. But if you want to change up your color coding system at any point, the pins are easily removable.
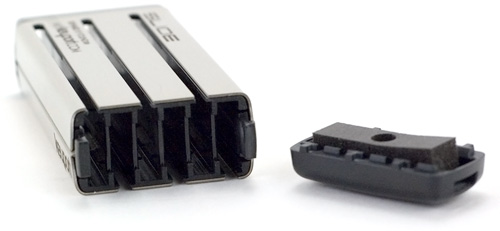
The next step is to remove the bottom cap from the Keyport housing. Again, a very simple process that admittedly is even easier if you have fingernails since it requires you to press a couple of thin buttons to ‘unlock’ it. But it’s not impossible if you don’t.
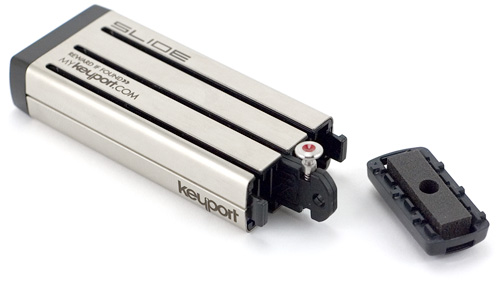
You then need to decide where and how you want your 6 keys to be oriented in the Keyport housing. But since the company recommends putting longer keys, like automotive ones, in the center, with shorter keys on the side, it’s a pretty easy decision to make. You just slide the key into the slot you’d prefer, press the button on the spring loaded pin as it’s going in, and that’s it. You’re of course able to swap key positions whenever and however you want, but when you’ve finally decided all you have to do is replace the end cap and you’re done.
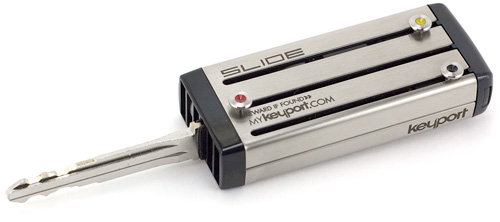
Once assembled, accessing the key you need on the Keyport Slide is as easy as pressing the button (which acts as a friction-based locking mechanism) and slide it out. It’s really that easy. And while I’ll admit that I’ve never really suffered from heavy keychain syndrome, the Keyport Slide still feels great in my pocket. More importantly though, it tends to blow people’s minds when you pull it out. As gadgets go it might be lacking a fancy touchscreen or other hallmarks of something high-tech and lustworthy, but it still manages to attract a lot of attention.
But there are still some caveats you’ll need to keep in mind if you’re thinking of switching to the Keyport. Sharing keys with someone is not impossible, but it’s far less convenient than with a regular old keyring. And I suspect you’ll be more concerned if one of your Keyport blades is loaned out but never returns. You can buy additional blades too if there are other keys you’d like to use on the Slide, but you’ll only be able to hold 6 at any one time. There are also issues with certain automotive keys that include built-in chips for security purposes. This isn’t something I had to deal with, but apparently only certain types of them can be accommodated by the Keyport. And obviously it’s not going to replace an electronic fob, but an included lanyard at least lets you keep one tethered to it.
*Update: Just to clarify here, popping off the bottom of the Keyport Slide (just make sure not to lose it in the process) and removing one of the keys to loan to someone is actually far easier than removing a standard key from those annoying metal rings. And the blades even feature a hole on the end allowing them to be secured to someone else’s keyring as needed. We just feel that you’ll be less inclined to share them with others given the replacement blanks still have to be ordered from Keyport should yours go missing.
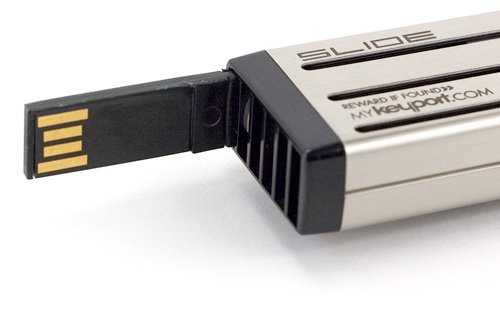
And while the Keyport was originally created to be used exclusively with keys, the company has recently started expanding its functionality with non-key inserts. We were sent the company’s new 4GB flash drive insert which adds a slide out USB memory stick to the mix. Opting for either the 4GB or 8GB insert does add to the overall cost of the Keyport Slide package (on their own they’re $18.99 and $28.99 respectively) and it also means there’s one less slot for holding keys. But it makes the Slide even more usable for someone like myself who usually only carries around just 2 keys every day.
The only complaint I have about the flash drive insert is that it can be a little awkward to connect to a computer or laptop, particularly given the overall weight of the Slide with 5 other keys installed. If they managed to engineer some mechanism where the flash drive could be easily removed and re-inserted as needed, I think it would make it a lot more useful and usable. But until then you’ll probably want to just use it with a USB extension cord.
*Update: As with the keys it’s actually rather easy to just pop off the bottom of the Keyport Slide and remove/re-orient the USB flash drive should you find yourself in a situation where you’re having difficulties connecting it to a computer. And using it while it’s in the Keyport housing is technically heavier than your standard flash drive, but the added weight is minimal and is certainly lighter than if your flash drive was connected to a large ring of regular keys.
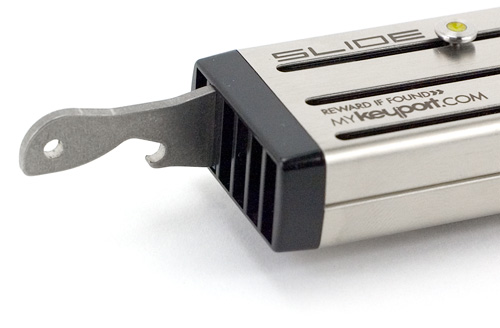
And if you don’t think you’ll find a flash drive handy there are other insert options as well. We were sent a handy bottle opener which feels more than sturdy enough to pop open a tasty brew, and is an extra $5.99. But the company has also recently introduced an LED light insert for an extra $9.99 which turns the Keyport Slide into a flashlight. It might not be particularly ideal for finding your way through the forest at night, but it’s perfect for finding a keyhole in the dark. It’s powered by 2 lithium button-type batteries which are good for about 15 hours. Though apparently you’ll have to send it back in every time you want the batteries replaced, which is an extra, extra $5.99.

So, I guess the big question is whether or not the Keyport Slide is worth the $79 price tag, plus the added hassle and expense of getting the keys properly ordered and cut. And as usual it’s not cut and dry. If you’ve got a massive collection of keys in your pocket that you either use every day, or don’t feel you can ever pare down to just 6, then probably no. There’s no point in carrying the Keyport and an additional set of keys at the same time, that’s just stupid. And admittedly, even if 6 is the perfect number for you, I don’t think most people would be that interested in making the switch for that much money.
But let’s be honest with ourselves here. If you’re a regular reader of OhGizmo! and other gadget blogs, then you most definitely have an affinity towards gadgets and technology. And as much as well all love the chance to play with a new device, trying out new features and functionality, we also get a kick out of being on the bleeding edge, and impressing others when we whip out a shiny new toy. And that’s where the Keyport Slide really shines.
It just looks amazingly slick, like something James Bond would use to open his Aston Martin. Sliding out the key you need like a switchblade just has some level of coolness that can’t be explained. So if you’re still thinking ‘meh’ and can’t understand why someone would pay $79 for a glorified key holder then the Slide probably isn’t for you. But if you’ve read this review and still think it’s pretty slick, then by all means I recommend checking it out. There are some hoops you have to jump through, but I really think they’re just minor inconveniences for the chance to feel like you’ve been equipped by MI6.
Pros:
+ A slick alternative to a ring full of random keys floating around in your pocket.
+ Refined ordering process means you don’t have to mail in your own set of keys.
+ Inserts like flash drives and LED lights expand its functionality.
+ Can be used with certain chip-based automotive keys.
+ Fantastic customer support. (It’s nice to deal with a company so dedicated to their product and improving it.)
Cons:
– Some may consider $79.99 a bit expensive for a fancy keychain. (They’d be wrong.)
– Limited to holding just 6 keys at one time, even less if you opt for an insert.
– You also have to factor in the cost of getting the blank blades cut yourself.
– Difficult to share just a single key with someone. You might be less inclined to share a key given replacement blanks need to be special ordered.
– Won’t replace fobs and is not compatible with all chip-based automotive keys.
Links:
Keyport Slide – $79
If you have any questions about the Keyport Slide you’d like answered, please feel free to leave them in the comments, and I’ll try to respond to them as best I can.



Mailing them a set of your keys is totally an out of this world idea, who would have thought that such a company will be expecting prospect clients to send in their keys through mail?
I’d rather spend less than 10 bucks on a carabiner, then attach the keys to my belt loop.
@Ben_Estate:disqus we still
How much are the replacement blanks?
I’m guessing the price varies a bit depending on what type of blank you need, but I didn’t see a cost for new/replacement blanks anywhere in the article (nice write up by the way).
$4.99 for regular blanks, and i think $19.99 for chipped keys
I’m thinking the’d do better leasing out the idea/process to local locksmiths/hardware stores. If could go down to the place I usually get my keys copied and get my keys cut and mounted while I waited I’d be willing to pay a hefty sum, otherwise it’s just to much hassle.
Don’t try to copy the keys in a hardware store – find a local locksmith store and do it right the first time. It’s going to be just a couple of bucks more but you know their key cutting machines are properly calibrated and you won’t have to order new blanks just because the guy at Home Depot didn’t know what he was doing. http://www.locksmith-sandiego.us
wow this Keyport Slide is so nice and i am so happy that you share this to all…..