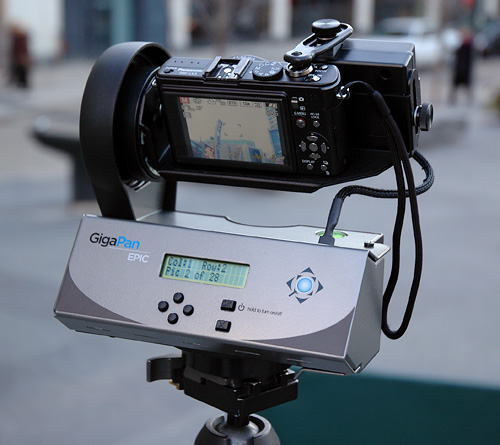
By Andrew Liszewski
We first wrote about the GigaPan EPIC panoramic camera mount a few weeks ago when it was used to create a massive 1,474 megapixel panorama of the recent presidential inauguration. Fortunately for me, a good friend of mine, and the guy behind the fantastic ‘daily dose of imagery‘ photoblog ordered one right away, and this past Sunday we took it for a test drive.
So is it worth the $379 that GigaPan is asking for it? In a nutshell, yes. But only if you’re a serious photographer looking for a reliable way to shoot panoramas and gigapixel sized images, or a hobbyist with money to burn who’s looking for something cool to do with your P&S camera. While it’s easy to use, the GigaPan EPIC definitely has a few minor quirks, so if you’ve been thinking about ordering one you’ll want to hit the jump for more of my impressions, sample photos and even a video of it in action!
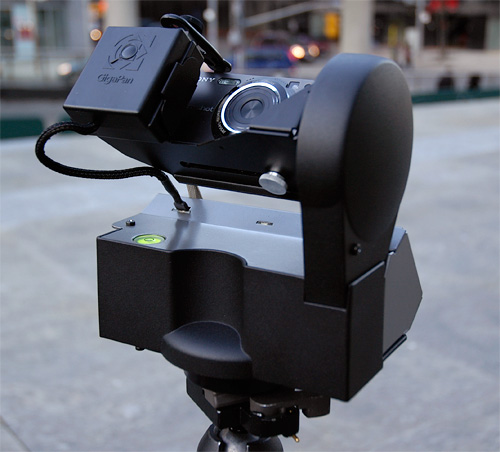
When I first saw the GigaPan EPIC in person I was surprised at how small and compact it was. For some reason I thought it would be a lot bigger. Now keep in mind that doesn’t mean it’s small enough to stash in your pocket or even a well-stocked camera bag, but you’ll have no trouble carrying it around in a backpack.
I was also impressed at the build quality of the EPIC. It still has kind of a homebrew look and feel to it, but it’s definitely solid and well-made, and should survive plenty of abuse in most shooting conditions.
But the ease-of-use, particularly when it comes to setup, is hands down its best feature. So let me walk you through the basics.
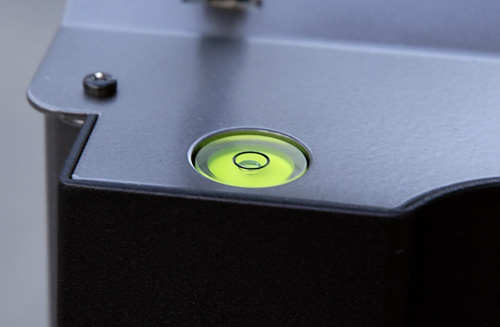
The EPIC can be used as a standalone device, sitting on the ground or on a table, but I think it’s probably a better idea to use it with a tripod, which is easy to do thanks to a handy tripod mount on the bottom. Not only does this keep it at a better shooting height, but with a ball and socket mount it makes it extremely easy to level the EPIC which is an important first step to producing good results. That’s why it comes with its own built-in bubble level.
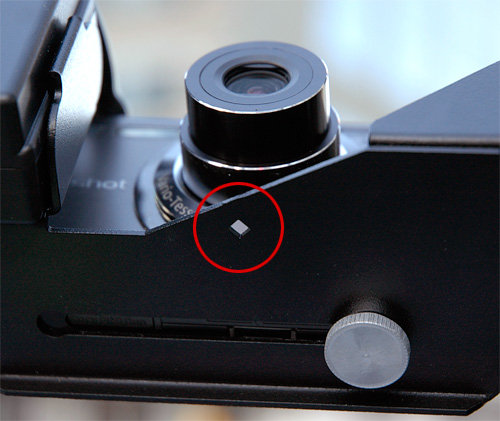
Once leveled, you attach your P&S camera the same way you would with a tripod, and then make sure the lens is centered on a small cutout square found on the mounting bracket. We tested the EPIC with a Panasonic LX3 and a Sony W300 and both worked fine, though I think the LX3 bordered on being just a bit too big, since the center mark ended up being just slightly off-center on the lens. But it didn’t end up being a problem.
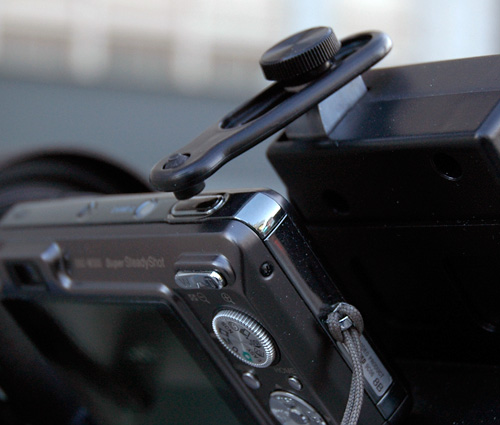
After mounting your camera you need to setup the EPIC’s shutter mechanism. Since it doesn’t interface with your camera in any electronic way, it relies on this simple arm with a rubber tip which physically presses down on your camera’s shutter to take the photos. I was skeptical how well it would work, but it ended up functioning flawlessly for every panorama we shot.
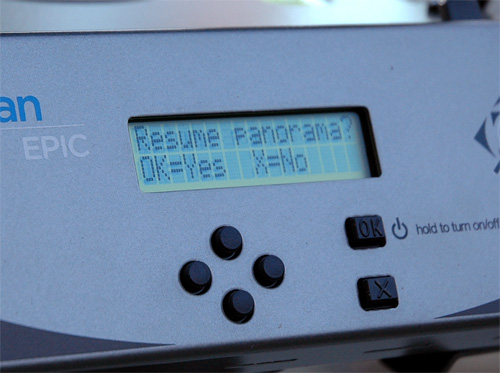
Finally, once the camera itself has been setup, which includes zooming in as far as you can go and locking the exposure and focus, you use the GigaPan EPIC’s simple set of control buttons and LCD display to setup the type and size of panorama you want to shoot. This involves using the 4-way buttons to ‘show’ the device the upper left and lower right corners of the area you want photographed, or in the case of a 360 degree panorama, the top and bottom extents of the image.
While you’re manually panning the mount using the 4 buttons, the LCD shows you how many photos will be captured for your panorama, which gives you a good idea of how big your final image will be. The EPIC’s interface is definitely pretty basic, but it still allows you to adjust a good number of options including how long it should linger before moving on to the next shot, or even loading the settings from a previous (completed) panorama.
When everything’s setup (it’s actually a lot easier than I’ve made it sound) and you give it the go-ahead, the EPIC will automatically start panning and snapping all of the photos needed for your panorama. And at any time during this process you can easily stop and re-shoot photos that might have overly curious pedestrians or other unwanted objects in the shot.
Here’s a video of the EPIC doing it’s thing. It’s not terribly exciting, but it shows you how the shutter mechanism works, and how quiet the pan and tilt motors are.
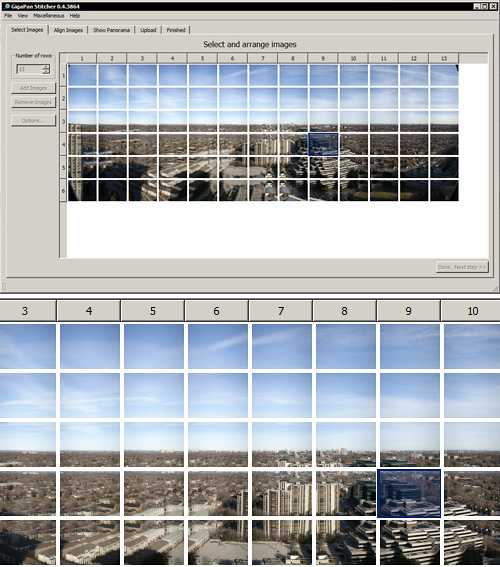
The other half of the GigaPan EPIC system, which is just as important as the hardware, is the included GigaPan Stitcher software. Importing a collection of photos is easy, but it’s up to you to manage and arrange them properly. It would be really handy if the EPIC could somehow connect to your camera so images could be automatically tagged with their order in a particular set while they’re being shot, but doing it manually in the Stitcher software afterwards is not that much of a hassle.
When you’re sure the images you’ve imported are arranged properly in the grid, you can start the Stitcher software processing, and depending on your PC and the overall size of your panorama, it could take a while. I think we clocked in an average of about 20-30 minutes for the samples you see below. The software does have options for spitting out Photoshop-friendly image formats, but by default you get a GigaPan-friendly image that can be uploaded to the GigaPan website to be shared via their interactive flash interface.
The whole process is actually quite simple, even for someone who’s not familiar with post-processing software like Photoshop, and the fact that GigaPan already provides an easy way for users to share their images is the icing on the cake. Neither of us were experts when it came to using the EPIC, in fact it was the first time I had ever touched it, but the panoramas we shot, which I’ve included below, turned out rather well.
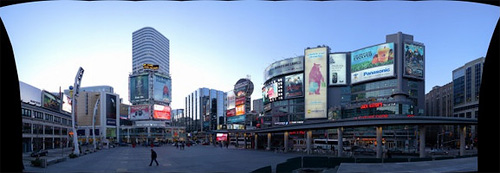
Toronto’s Dundas Square shot with Panasonic LX3 and Gigapan EPIC.
©2009 Sam Javanrouh

Toronto’s Dundas Square 360 shot with Panasonic LX3 and Gigapan EPIC.
©2009 Sam Javanrouh
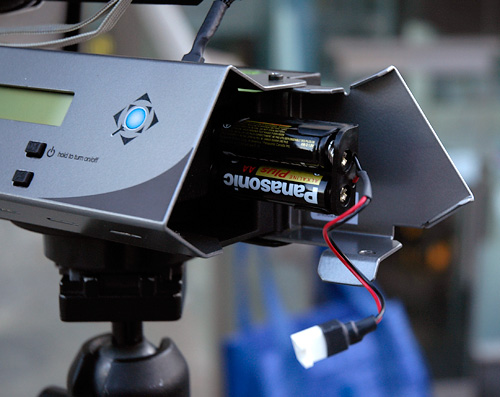
But the GigaPan EPIC isn’t perfect. In fact it’s got a pretty big flaw. We all know that battery life is the bane of almost all consumer electronics, but the EPIC does particularly bad in this department. The company claims that with a fresh set of ‘brand name’ batteries the EPIC can take about 1,000 shots at room temperature, but our own tests saw it running out of battery life well before that. Now I’ll admit that Sunday wasn’t the warmest of days here in Toronto, in fact the thermometer was just below the freezing mark, but as it stands we’ve found the GigaPan EPIC is almost useless for any outside photography until the weather warms up. I’m not sure what’s on the company’s to-do list for future versions of the product, but they better bump ‘improved battery life’ to numero uno.
The GigaPan EPIC is available from the GigaPan Systems website for $379, and if you’re a photography enthusiast I still think it’s a worthwhile investment. Battery life is an obvious issue, but it can mostly be solved with a couple sets of rechargeable AA’s. Just don’t expect to spend your whole day shooting panoramas with it.
And I’d like to thank Sam Javanrouh for letting me join him while he was breaking in his new toy. If you haven’t added the RSS feed for his DDOI photoblog to your feedreader, you’re doing yourself a great disservice.
[ GigaPan EPIC ]


Or just take a ton of photos on your own without having to use such a contraption and use the free program Autostitch (http://www.cs.ubc.ca/~mbrown/autostitch/autosti…).
Seems waaaay easier and far cheaper….AND Autostitch sorts the photos for you!
Dorian – something like this is good because it rotates around the nodal point of the lens (I'm presuming that's what the 'line up through the little hole' step is for) – which is the only way to eliminate parallax errors when you stitch your panoramas together.
Also, gigapixel+ images are composed of hundreds of multi-megapixel shots, taken at high zoom. Doing it with a tripod and a manual panoramic head is slow and fiddly – as far as doing it hand-held goes, forget it – it'd drive you insane.
Why doesn't the GigaPan software just look at the date modified attribute on the picture files to automatically put them in the correct order? Or look for number sequences in the file names?
Yes, there's no reason it couldn't do that to get a rough grid of images gathered. The time difference between series of shots is more than long enough for the software to make an intelligent guess as to where a series begins and ends. However, you'd still have to go in and weed out duplicate shots anytime you had to do re-takes during a shoot, which was every time for us.
As it stands the GigaPan Stitcher software is definitely pretty basic right now, and there's plenty of room for improvement and polish.